Qt could be wonderful for developing cross-platform C++ GUI applications.
This is my firt attempt to transfer this posibility to my students and it is a simple guide for my steps.
Read carefully the "Tour rápido de Qt Creator" that you will easily find when you run the Qt Creator.
I propose a a first contact with the "Qt creator" IDE trying to write and run a typical "Hello program" for the C program.
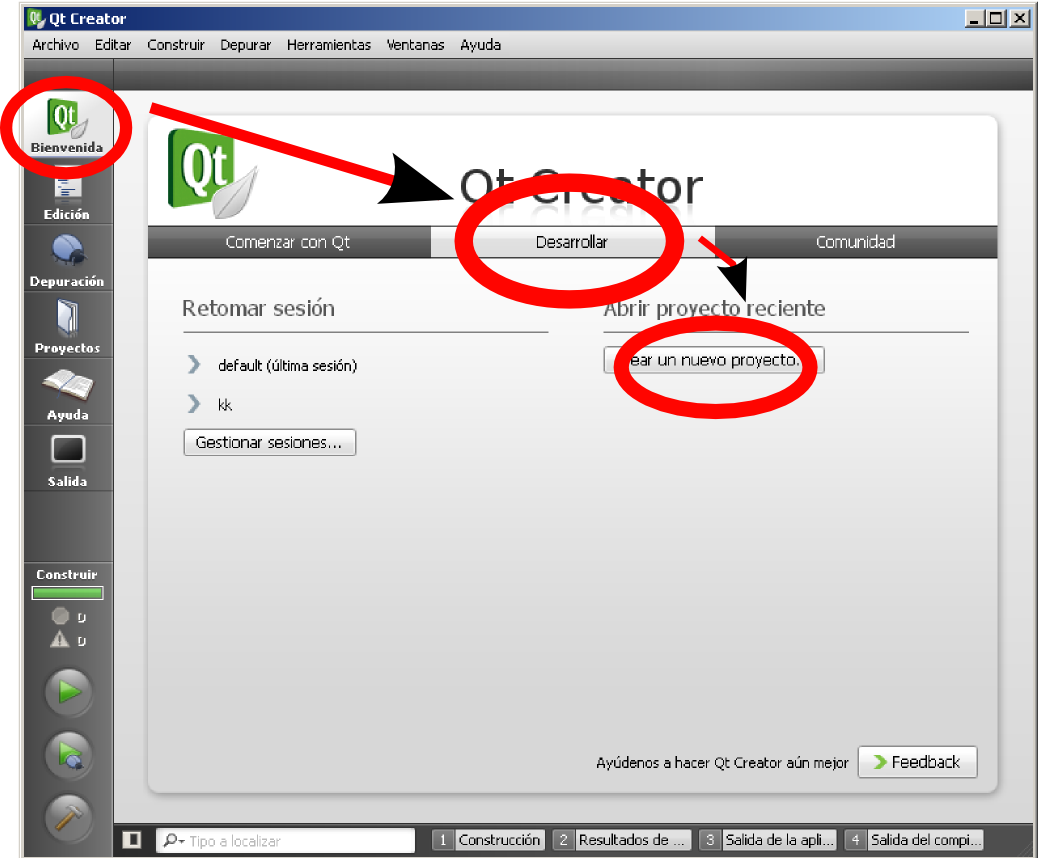
First, we need to create a project. Follow steps on next figure to acces to this option:
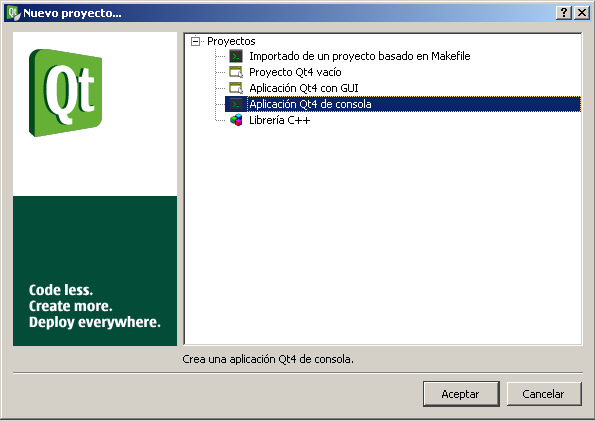
Now you must select the type of project to be created. There are few options, and all related to Qt project creation.
It seems that te best option for a C generic program is to select the item marked in the next image and to modify it.
You wiil be asked for a name for the project and a directory for putting files. You should create a new directory on some place to place these files.
After this step, you will be asked for the modiules to be included in the project. Do not change anything.
After creating the project you will enter in the edition mode. You can access a main.cpp file with the following code:
#include <QtCore/QCoreApplication>

int main(int argc, char *argv[])
{
    QCoreApplication a(argc, argv);

    return a.exec();
}
Hummm, probably you do not understand too much, but you can appreciate an standard C program.
Well, let me to convert it to our well known "Hello world" for the C language.
//#include <QtCore/QCoreApplication>
#include <stdio.h>

int main(int argc, char *argv[])
{
    //QCoreApplication a(argc, argv);
    printf("Hello, world!!!! ... Qt is near!\n");
    getchar();

    //return a.exec();
    return(0);
}
And runt it. You should know how to do that beacuse you read the seguested previous sections and tutorials.
To continue playing with the environment, I suggest to try to debug a program (break points, step-by-stp, ...).
Modify the previous example, adding the following code:
//#include <QtCore/QCoreApplication>
#include <stdio.h>
int main(int argc, char *argv[])
{
int i;
//QCoreApplication a(argc, argv);
printf("Hola Mundo\n");
for (i=0; i<100;i++) {
printf("i vale %d\n",i);
}
getchar();
//return a.exec();
return(0);
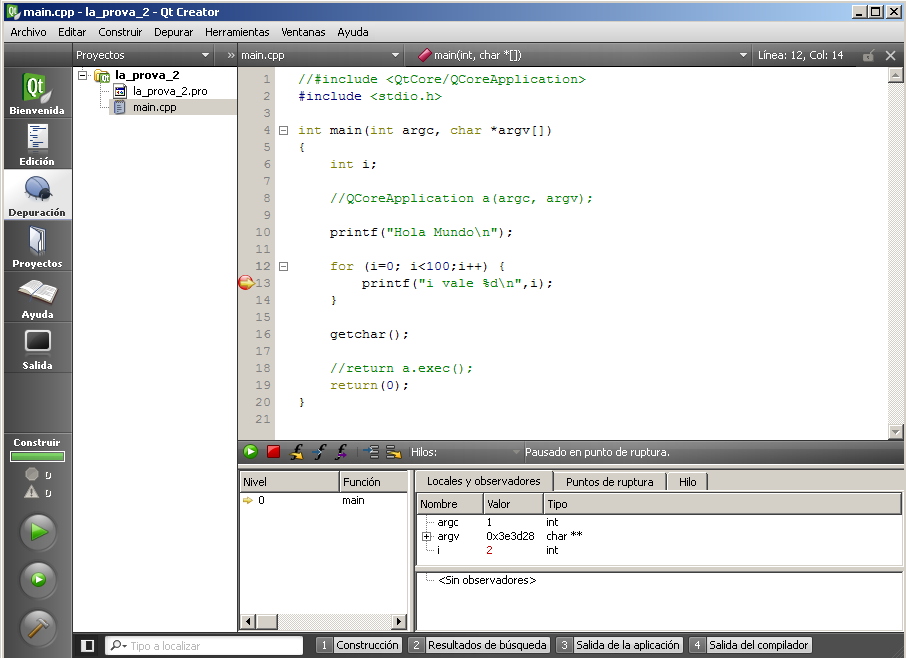
}Build the application and put a breakpoint in the loop and play with the debugger (using left button marked with a bug). You could get a view similar to this one:
Ficar enllaç per descarregar apunts.